Monday, September 20, 2010

One of Our Favorites!!


Does this or does this not make your salivary glands go into over-drive? I can't help but to look at this spread and want more! This has become one of our favorite things to do on a Sunday night. Not many restaurants are open on Sunday so this is a great reason to get creative with our "last moments together before the next work week begins" meal.

We have taken to riding our bikes on Sunday afternoons to get some exercise and discover more about Dusseldorf. There are some local bakeries open and usually a meat & cheese shop here or there. I love trying new meats and cheeses (as long as they don't smell funny!) and this particular showcase of meat and cheese was dazzling my taste buds. We got the Tomato Feta Salad from a local restaurant that makes mostly Greek foods. The pickles, meats and cheeses were from the street fair down on the Rhine River. Add to that the Ciabatta and Cheese Rolls with some locally made mustard and you have the "fixins" for a delicious German meal.

I can't even explain what a pleasure this meal is...no cooking, easy clean up, formed to our liking and leftovers area snap! Hope you'll give this a try...OH! And here's a link to a company that will deliver frozen European Rolls and Bread (still in dough form) to your door. You simply freeze them until you're ready to bake and then pop them in your oven after thawing. You really need to experience German Rolls to appreciate the tastiness of these sandwiches!! Enjoy

http://www.europebread.com/index.php?p=home

Be sure to leave a note and let us know what is one of your favorite meals and why!

With Love In The Mix,
Shannon

Tuesday, September 7, 2010

Hotel Cooking Part Zwei!

I posted on facebook the other day how much I was craving Fall Foods such as chili, stews, casseroles and so on because the weather here is already "I can see my breath" cold. I love it and Autumn is my favorite time of year. I absolutely love Sweater Weather and Football Weather!! Something we never had in Malaysia!! So I am quite comfortable temperatures in the 40's - 60's. Unlike my previous pasta sauce in the hotel room that I made to welcome my husband back from England and just to give him a nice little surprise, this recipe was all about me! (He doesn't like chili anyway). I was craving chili in some form and the only things keeping me from it was the beans and the weather. It's raining outside which inhibits my bike riding. And although I'm a fan of cold weather, I am not a fan of purposefully putting myself in the cold rain. There are a lot of things I'll do in the name of food but that is not one of them!!

Here is what I had on hand (I actually bought it the day before when the chili bug bit me)

This tiny chili pepper was flown in all the way from Ohio! It came from Pop's garden where Scott and his dad planted it this past spring. Pop sent the pepper to me here in Germany and my fingers have been itching to use it. So I dried them first and then minced it up for the chili. I added my pinky to give you some perspective.


Here are the vegetables... 1 Roma Tomato, chopped; 6 Baby Bellas, chopped; 2 Green Onions and the little, tiny, Thai Chili Pepper.
I placed the hamburger into my only cooking bowl/cereal bowl/pasta bowl. Then sprinkled it with Sea Salt and Black Pepper. Cooked it for 1 minute.
Added the chopped mushrooms, mix and cook for another 1 minute.
Added the green onion, mix and cook for another 1 minute.
The secret ingredient...Beer. Hey, I'm in Germany. They drink this stuff for water. Anyway, if you don't cook with beer, don't fret. Just use a beef or pork broth instead. About 1/2 cup. Usually, when I cook with beer, I use a dark beer because it makes the most amazing sauce and it tastes nothing like beer! This is good because I find beer to be repulsive. The taste of it makes me want to hurl. But somehow, it's just amazing to cook with!
Final addition of chopped tomato, the little Thai Chili and about 1/2 C water. Then I cooked the daylights out of it!! 3 minutes, then set, 3 minutes then set again. Repeated this for a couple of hours until the flavors got to know one another.
It's really amazing how many seeds came out of that little pepper! Again, the finger is there for perspective. And yes, all the seeds went in!

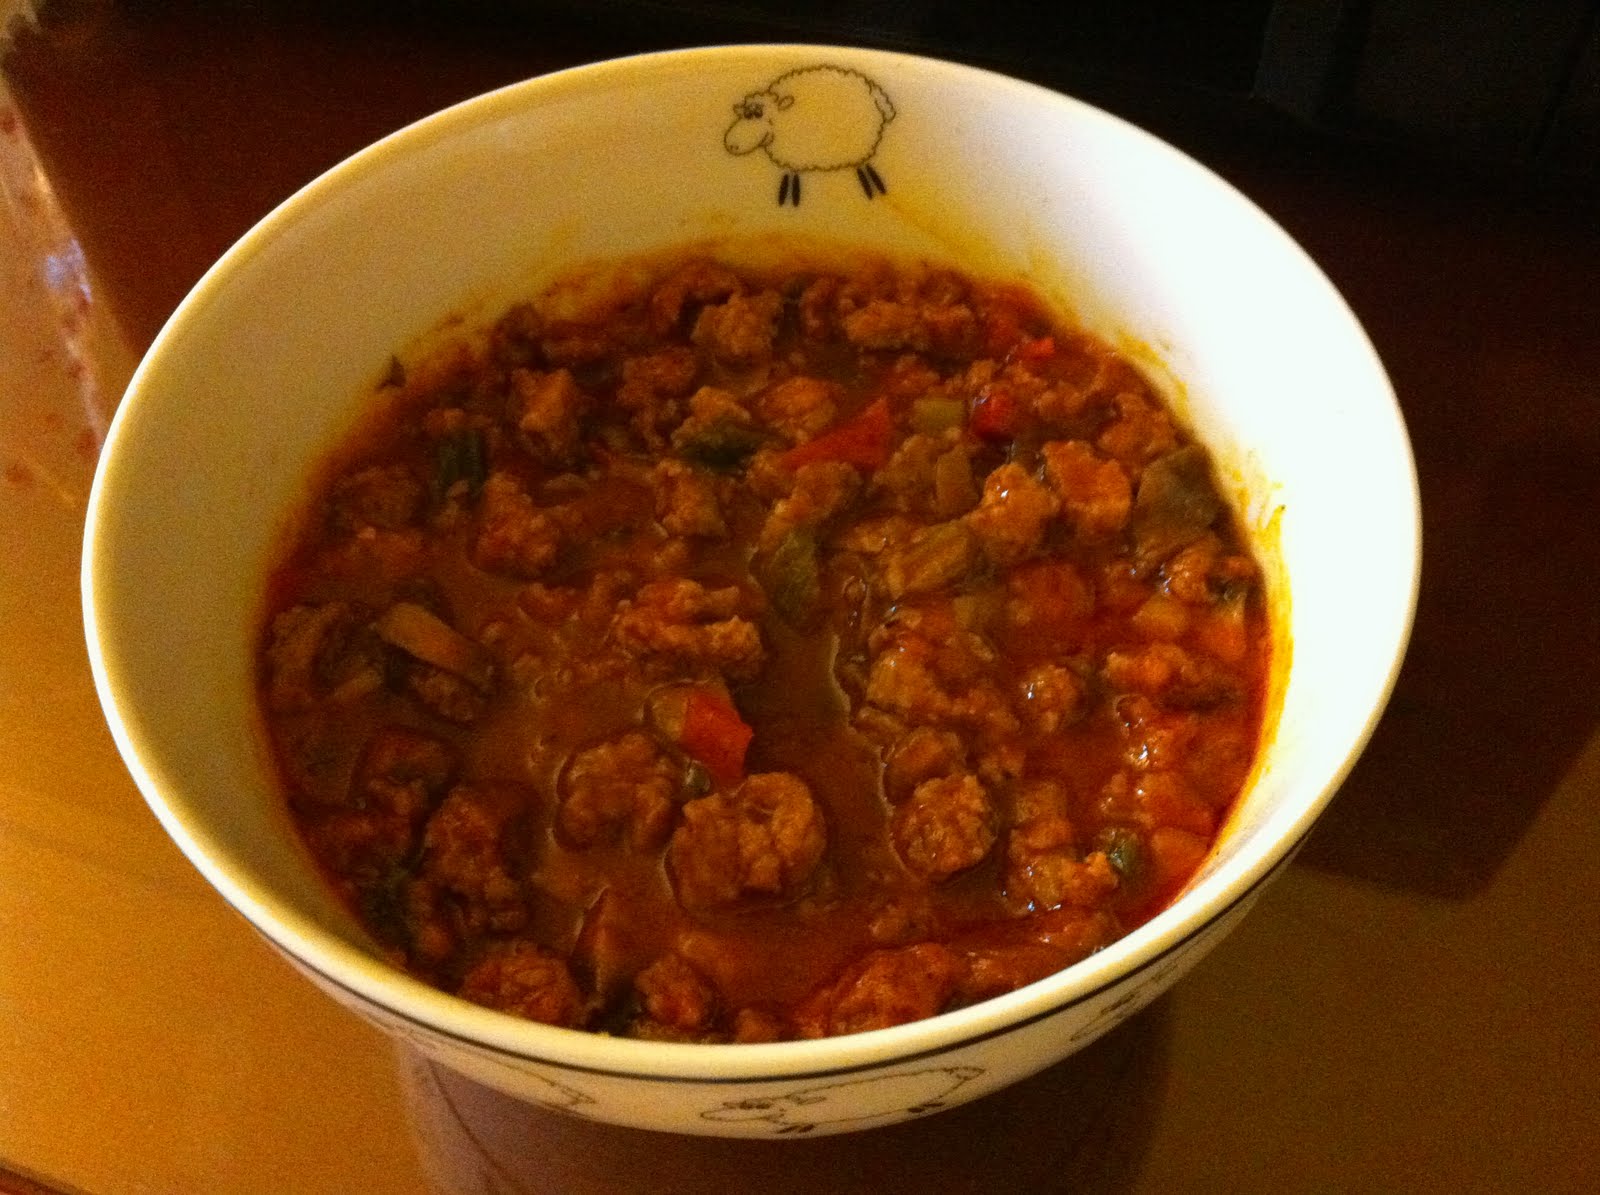
The finished product! Ta-daa! I also had this great cheese in the fridge. A mild white cheese with cumin seed in it. It had a delicious smoky flavor to it so I diced it up and chucked it in. Mmmm!

The only thing I didn't take a picture of was the spices. Because I don't have my spices here with me, I had to use a blend from the store from the Knorr company. It was Knorr Chili Con Carne. I used half an envelope for this but you could add whatever blend you prefer. If I was making this at home, I'd use a home made blend of chili powder, cumin, paprika, S&P and cayenne.

As I was waiting for the pictures up upload, I ate this beautiful concoction. My belly is very happy at the moment! The spice of that Thai chili was perfect. Not too hot but just a little tingle on my tongue. Give it a try! Cheers!!

Shannon

BTW - If you have a microwave recipe that you love...send it to me and I'll be sure to include it on this post!!

Monday, August 9, 2010

Hotel Cooking!

I have to give credit to where credit is due...Ah, those college days! Sunday evenings was a time when the dining hall shut down to any type of hot meal and brown bag sandwiches were past out. Always a choice between PB&J or some type of meat and cheese, chips, fruit and a snack cake. Sometimes those brown bag beauties were just too much, we needed to step aside from the norm and do something creative. So we began collecting butter pats and pieces of foil. Soon we were using our irons to make grilled ham and cheese sandwiches! Sometimes it was grilled PB&J but not often as the peanut butter was already thinned down with marshmallow cream and heating it just made it messier than we liked. But those grilled sandwiches were a wonderful break from the norm!!

Sitting in a hotel room day after day and going through the same rut of waiting for Scott to come home so that we could go to a restaurant and eat someone else's cooking just becomes sooooo mundane! A flicker of genius (or a stirred memory - however you choose to look at it...I prefer genius!) and my mind is turning with ideas of what I can make with the limited amount of equipment that I have.

I had seen packages of pre-chopped bacon in the grocery stores and thought "I could cook that in the microwave!" and the wheels continued to turn...I could buy a couple of different types of sauce, add some bacon, some grated Parmesan, fresh basil (I'm growing it in the window ledge) and have a delicious sauce! Add some pasta and grilled bread and VIOLA! So I went to work on a trial run while Scott was away in England. It was delicious!! So I went back to the store and bought more of the same items and also a small package of ground hamburger. Here's my list...and understand these are German products so if you want to create this, you'll have to wing it just like I did!

1 Jar Tomato Bolognese Sauce (about 12 oz.)
1 Jar Red Pesto Sauce (about 8 oz.)
1/2 lb (approximately) Ground Hamburger
1 Lg Green Onion, sliced
1 Bottle Merlot Wine (this was already in the room, just thought I'd put it to use since we wouldn't be drinking it!)
Grated Romano Cheese
1 Small Round of Rosemary Focaccia Bread
Garlic Butter
5-6 Leaves of Fresh Basil
1 Small pkg Cheese Tortellinis
Salt and Pepper

I cooked the meat (with the S&P), added the sauces, about 3 tbsp of the Merlot, green onions, & Romano cheese. I microwaved this concoction several times for 5 minutes each time, stirring, letting sit for a while, reheating and continue this throughout the day until early evening when I let it sit to room temp and then added it to the fridge. We have a tiny fridge and if I had put it in the fridge when it was hot, everything else would have spoiled. It doesn't have much cooling power. The next day I did the same thing...heating it up once an hour for 5 minutes each. (I did end up adding about 1 cup of water to the sauce as it thickened up during the cooking process).

When it was about 2 hours before Scott was due to be home. I heated a bowl of salted water to very hot and added the pasta. Cooked until al dente and then mixed the pasta in with the sauce. Heated it up a few times with the sauce so their flavors could get to know one another. I also added the basil at this time so that I didn't over-cook it!


The bread was easy. Fold foil into a make-shift rimmed pan. Butter the bread and place on foil pan and place on a very hot iron until browned. You must have a rim though or else your butter could run off and burn you or stain whatever it lands on.


Here are some pics of what I and the results!
Photobucket
Rosemary Focaccia in the "pan"

Photobucket
"pan" on the "grill"

Photobucket
Finished product complete with fresh garnish

Photobucket
Cheese Tortelloni with Tomato Basil Bolognese and Grilled Garlic Bread!

YUMMY! or as they say in Germany...Lecker Lecker!


Now for the disclaimer...

Do not try this at home or in any hotel room. I knew the risk of performing these tasks and did them anyway. If you choose to be as silly as me and cook using an iron or any various other non-cooking utensils, you do so at your own risk!!


Enjoy your day!

With Love in the Mix!

Shannon

Tuesday, July 13, 2010

For The Love of Smoothies!

Photobucket
I was first introduced to smoothies in South Carolina when I worked at a little organic foods grocery store/cafe. I am so glad to have discovered them there because I've never had smoothies that good since...at least my first experience was the best and I can make them the way I love them!

The key to a great smoothie - USE FROZEN FRUIT! and LEAVE THE ICE IN THE FREEZER!

For those of you who are trying to beat the heat, what better way than with an ice-cold fruit smoothie? (ok, water would be better but smoothies just taste so good!) Soda and Sugary Drinks aren't going to cut it and they don't carry the nutritional weight that a smoothie does.

In my quest to eat healthier by leaving the over-processed, chemical laden foods on the shelves, I have rediscovered my love for smoothies! Our bodies can process liquids easier and more effectively than solids (great reason for chewing up your food better) so liquefying fruit in a blender is going to aid your digestion process, helping you absorb more of those wonderful vitamins and nutrients.

For those of you with children...what an incredible way to get them to eat healthier! These smoothies taste like milk shakes and are a great summer treat...not to mention the kiddies can play outside after drinking one of these without having all that milk and sugar sitting on their guts!

Better yet, there is no exact recipe...you make it how you like it. Just follow some simple guidelines and you can make whatever flavor smoothie suits your taste buds!

#1. Purchase simple ingredients first...bananas, strawberries, peaches. These are great starters for beginner smoothie makers. You can spruce it up later with kiwi, pineapple, berries etc, but this is actually my favorite...just the basics.

#2. Purchase apple cider...it's a completely different flavor than apple juice when making a smoothie. You can usually find small 1 qt jugs or even 1 pt jugs in the grocery stores or at farmer's markets.

#3. Purchase a box of the snack size zip-locks.

#4. Chop your fruit into bite-size pieces. Bananas - about 1"-2" segments. Strawberries - halved or quartered (if they're big). Peaches - 1"-2" chunks.

#5. Place 4-5 pieces of fruit in each snack size baggie, squeeze out as much air as possible, place in freezer for several hours or overnight.


Those are the basics!

~ Now for the assembly ~

~ Pull fruit from the freezer and break up while it's still in the baggie until all or most of the individual pieces are separated. It's important that you use bananas in every smoothie...it's the base - the most important part of the smoothie.

~ Place fruit from each baggie into a blender (You're using the smallest snack size baggies so one baggie of bananas and one baggie of strawberries and one baggie of peaches makes a good size smoothie for one adult - after you make the first one, you'll have a better idea of how much or how little to add to make the right size for you or your children).

~ Pour in about 1/2 C of the apple cider and liquefy in the blender with the lid securely shut. If the mixture seems to thick (not breaking down and rolling through the blender blades smoothly) then shut off the blender, add another 1/4 C of cider and continue blending.


THAT'S IT!!! Pour into a glass and drink! Parents ~ got any of those old Popsicle molds or Dixie Cups and Popsicle sticks? Pour the blended mixture into these small containers and pop back into the freezer for a frozen sweet treat on a stick!! Did I mention they were healthy? Ssshhh!


Now, once you're a pro at this, start adding different fruits and even nuts (if you like little crunchy bits in your smoothie). There's also a variety of add-ins that you can...well...add in to your smoothie if you're into that sort of thing. I'm talking natural herbs and such that promote holistic lifestyles. But for me - the basic smoothie is my favorite and I hope it becomes yours too!


Please Note - Wash all fruits well before cutting and freezing! If possible, purchase fruits that are organic - pesticide free!

Enjoy!

Shannon

Do you have a favorite concoction or recipe for smoothies? Send it to me by email or through the comments button below and I'll be sure to post it here! Thanks!

Sunday, June 27, 2010

Please Be Patient With Me! : )

More recipes are on the way...we are hotel living in Germany until we can find a home. My husband and I drove around Dorston all day today looking at homes and communities. Beautiful country! Just won't be able to post many recipes and pics until we get settled. I will, however, work on posting some of my past recipes and some recipes of German foods I have already tried (of course, the authenticity will be as close as I can get it). (wink and a smile)

Have a great week!

Shannon

Saturday, May 29, 2010

I haven't Forgotten My Blog!

Honestly, I've got so much going on right now I haven't had time to experiment in the kitchen. Sad, I know. We're moving to Germany in two weeks (June 13th) and there is still so much to do! We've spent the entire week tearing apart and rebuilding the deck. What a job! Now it's time to box everything up and get it packed into crates.

I did have the opportunity to make this recipe the other day and it was really delicious! I want to find a way to thicken the brown butter sauce so it stays on the noodle. But it's an incredible flavor none-the-less!

Spaghetti with Chicken & Broccoli with a Brown Butter Sauce


Mizithra cheese is a yummy, hard Greek cheese but if you cannot find it, Freshly Shredded Romano is a great substitute! That's what I used!

Ingredients:
1 cup butter
1 cup Mizithra cheese
pasta of choice (I used spaghetti)
2 Boneless Skinless Chicken Breasts
3 C Fresh Broccoli


Directions:

Dice chicken into small pieces and cook in a large skillet with some olive oil, salt and pepper until just done. Do not over-cook. Set aside. Meanwhile, cook the pasta and steam the broccoli. Combine the pasta, chicken and broccoli in a large pot and keep covered and warm.

Browned Butter Procedure: Cut 2 sticks of butter into 8 pieces and place in a 2-quart sauce pan. Place the pan of butter on a burner on medium heat. Bring butter to a slow boil (about 5 minutes). (This wasn't enough for 4-6 portions of the meal so I added 1 more stick and continued with the directions)

Once the butter begins to boil, stir constantly to prevent residue from sticking to the bottom of the pan. As the butter cooks, it will start to foam and rise. Continue stirring, otherwise the butter foam could overflow (about 5 minutes) and catch fire.

Once the butter stops foaming and rising, cook until amber in color (about 1 to 2 minutes). It will have a pleasant caramel aroma.

Turn off the heat and remove pan from burner. Let the sediment settle to the bottom of the pan for a few minutes.

Pour the brown butter through a strainer into a small bowl. Do not disturb the residue at the bottom of the pan. (When cooking this, the foam came back and I gently poured the butter into a separate container. The butter drizzled out from under the foam and over the residue on the bottom)

The brown butter can be stored in the refrigerator and reheated in a microwave as needed.


Pour the butter over the pasta mixture and toss gently with the shredded cheese. Using a spaghetti server, fill plates or bowls with desired amount of the meal. If there's extra sauce in the pan, drizzle evenly over the individual dishes. Serve immediately!

Thursday, April 15, 2010

This is the way I want to go out of this world...


Eating one of these brownies! I've been on a search for the most perfect brownie recipe and I do believe I've found it. I was very disappointed at the beginning of my search and threw away a few batches because the brownies were dry and tough. I found out that the flour my father-in-law had in the canister was "better for bread" flour. OH MY! No wonder they were all wrong! I like mine...well, perfect. Not too cakey, not too fudgey, not too chewy. But somewhere right in the middle of those three.

I started on this journey for one reason...besides the obvious ( I wanted to eat lots of brownies) and that was to show my darling husband that the box mixes are not the best. Grrrr! The Foodie's husband likes boxed mixes better than homemade. I'll not have it! he hee! Now, while on this journey, I began realizing how much healthier homemade brownies are than boxed brownies...no chemical, no preservatives, nothing artificial! Yes, they're loaded with butter and sugar but everything in moderation is a good thing. Although, it's really difficult to be moderate when it comes to these babies!

Done talking...on to the brownies!

You must make this caramel sauce! It is absolutely divine! I reduced the amount of sea salt because the original recipe was way too salty. Phew! But make it ahead of time and give it time to cool a bit while you make the brownies!

Sea Salt Caramel Brownies


Sea Salt Caramel

* 1/2 cup heavy cream
* 1/2 teaspoon sea salt
* 1 cup sugar
* 2 tablespoons light corn syrup
* 1 teaspoon Vanilla
* 1/4 cup sour cream

In a small saucepan, combine the cream and the salt. Simmer over very low heat until the salt is dissolved. set aside.

In a medium saucepan combine the sugar and corn syrup carefully. They will not combine well until the sugar begins to melt. (It will seem ridiculous at first but keep at it, scraping the mixture off the spoon so that all the sugar cooks at the same time and temp.) Cook over high heat until an instant-read thermometer reads 350 degrees, 6 to 8 minutes. Without a thermometer, just pull the sugar off the heat when it is a medium goldish brown – it will continue to cook in the heat of the pan. Better to pull it too early than too late. Remove from the heat and let cool for one minute.

Add the cream mixture and the vanilla to the sugar mixture. Do this carefully! The mixture will steam and sputter while you drizzle it in. Use a large wooden spoon for this step. Keep stirring even if you get some clumps. It will be OK. Whisk in the sour cream. Let the caramel cool to room temp, then follow the brownie instructions. Transfer to an airtight container and refrigerate any leftover caramel. it makes a great ice cream topping or tastes great straight out of the jar. Yes, do this. Spoon it straight from the jar and indulge...after it's cooled of course.


Brownies


• 4 ounces Semi-sweet chocolate (Ghirradeli's is the best)
• 1/2 cup butter
• 1 1/2 cups sugar
• 2 teaspoons vanilla
• 3 eggs
1 C Cake flour
• 3/4 cup all purpose flour
• pinch salt
• 1/4 cup Chocolate Syrup
• half of the above caramel recipe

Preheat oven to 325F.


Melt Chocolate and butter in small saucepan over low heat until smooth. Remove from heat and allow to cool for 5 minutes.
In a bowl, mix together sugar, eggs, and vanilla, and mix until well combined

Add flour, salt, chocolate syrup and chocolate mixture and blend well.

In a greased 8×8 pan, pour a little over half of the brownie batter and bake for 18 minutes. Remove from oven and pour in the caramel. On top of the caramel, add the rest of your brownie batter. If it doesn’t pour smoothly, just plop it in a swirl it around a little bit. (I once added a bit of water (not much) to the leftover batter with good results). Return to oven and bake for another 18-22 minutes. Brownies will still appear a little shaky, due to the caramel, but they will firm up once cooled. Do not over-bake them.


I have found it a very good idea to bake these in a stoneware baking dish (I used Pampered Chef) but glass is not a good idea. It cooks the brownies too quickly on the outside and then the edges harden and dry out. Ick! It's also worth mentioning, if you use a cheap rubber spatula to stir the caramel, you will lose at least half of the end of the spatula before you realize that bits of it are swimming through your caramel. Yeh, learned that one on my own!! Use the good stuff! Stay with wooden or use Pampered Chef....they have one that withstands temps up to 500*F I believe.